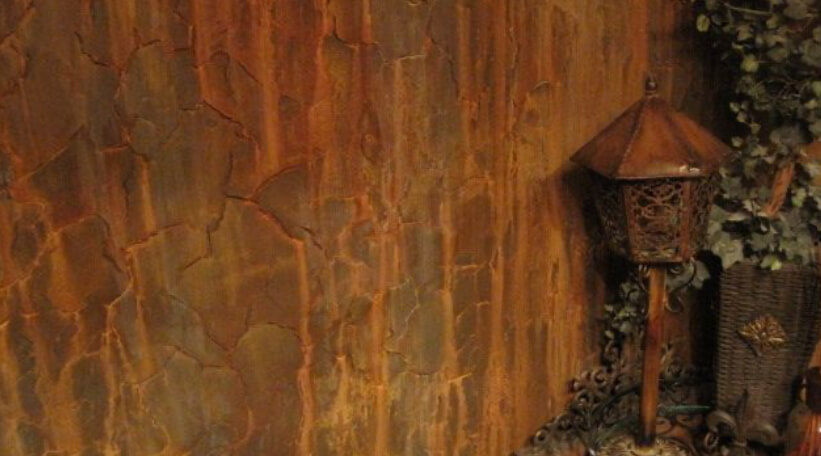
You don’t have to be a professional faux finisher to create a decorative painted effect.
By Diane Franklin
Done well, a faux-finished effect adds drama, elegance, fun and/or whimsy to your walls and other painted surfaces. Done poorly, a faux-finished effect will have you running for a can of paint and paint roller for a quick and merciful “do-over.”
Novice faux painters are likely to have a few misfires as they try to create a decorative painted effect that rivals the work of the pros. And the truth is that for the most difficult-to-achieve finishes—i.e., marbleized effects, authentic wood grains and multi-layered Venetian plasters—you would be better off hiring a professional faux finisher.
If you’d like to indulge your creative side and try some faux-finished effects on your own, the best path would be to start with techniques that you can accomplish by following a few simple steps. With any painting technique that you’ve never done before, it’s always a good idea to try it out on a sample board first. That way, you can practice until you’re happy with the look you’re hoping to achieve. Below are five basic techniques to get you started.
Color Washing
- Choose two complementary paint colors, preferably in the same color family. The paint should be acrylic or latex, with the base coat in a satin sheen and the second coat in a satin, eggshell or semi-gloss. The lighter of the two colors is typically the best choice for your base coat.
- Prep walls as you would for a standard paint job (clean walls, fill holes with spackling compound, sand and prime the spackled areas, etc.). Use painter’s tape to protect molding and ceiling area. Protect floors with drop cloths.
- Paint the base coat. Allow to dry for a minimum of 24 hours.
- Mix your second color of acrylic or latex paint with glaze. You can experiment with different ratios, but 4 parts glaze to 1 part paint is a good starting point. The more glaze you use, the more transparent the look will be.
- Apply the mixture with a brush, roller, sponge or cloth, depending upon the look you want to achieve. Use a crosshatch method or a circular motion, blending and feathering as you go. Try different sample boards to see which application tool and method you prefer.
Sponging
- Choose your paint colors, selecting a base coat and an additional two, three or even four colors to sponge on top. The more colors you use, the more depth you’ll create. Select your base coat in an acrylic or latex with a flat, satin or eggshell sheen. Sponged-on layers should be satin, eggshell or semi-gloss.
- Prep the walls as described in the Color Washing technique above.
- Paint the base coat. Allow to dry for a minimum of 24 hours.
- Sponge on your topcoats using a natural sea sponge for best results. You can modify the translucency for each layer by mixing the paint with increasing amounts of glaze. For instance, sponge on your first layer with no glaze or with glaze added at a minimal ratio (1-to-1 or 2-to-1). Sponge on additional layers with a higher proportion of glaze (3-to-1 or 4-to-1, for instance). This will add translucency to let the first layers show through.
- Dab the sponge into the paint/glaze mixture and blot off most of it onto the paint tray. Lightly press the sponge onto the wall. You can vary the pressure slightly to create varying degrees of depth. Twist and turn your hand to create the sponge pattern. Overlap the sponge impressions to create a pleasing visual effect. Again, it is recommended to try your technique on a sample board to ensure you like the effect.
- Sponge as close to the edges of the wall as possible. Dab on your sponge colors with a paintbrush or cloth to ensure a finished look at baseboards and ceiling lines.
Rag Rolling
- Rag rolling is similar to sponging, though it uses a different method—a twisted rag—to apply the paint to the surface. Choose acrylic or latex paint in two colors—one for the base coat and one for the second coat, which can be mixed with glaze for more translucency. Contrasting colors—i.e., one dark and one light—provide the most drama for this technique.
- Prep the walls as described in Step 2 of Color Washing.
- Paint the base coat. Allow to dry for a minimum of 24 hours.
- Wearing gloves, dunk a dry painter’s rag into your paint/glaze mixture and twist it to create a series of overlapping folds. Using two hands, roll the rag down the wall.
- Reload the rag as needed, being careful not to oversaturate. Overlap the previously applied section, building it out to create a random pattern. Use portions of the rag to continue the pattern into the corners and abutting with the ceiling lines and baseboard.
Crackle Paint
- Use this technique on doors, furniture, accessories and walls. Start by sanding the surface you intend to crackle. Clean the surface after sanding.
- Prime the surface with paint primer and let dry.
- Apply a base coat of latex paint, using an eggshell, satin or semi-gloss. Let dry overnight.
- Use a crackle medium. Some people use white school glue, but to ensure the best results, the commercial brands available from your local paint store will be your best bet. Apply according to label directions.
- After waiting for the crackle to dry (between one and four hours) apply a topcoat, in a contrasting color from your base coat, over the crackle medium. The topcoat will shrink and crackle to reveal the base coat underneath. Avoid going over areas you’ve already painted, as this will lessen the crackle effect.
- Optional: Apply a clear coat over furniture pieces to protect the finish.
Strié (Dragging)
- Choose two contrasting but complementary colors in an acrylic or latex paint. The base coat should be an eggshell, satin or semi-gloss sheen. The topcoat, to be mixed with glaze, can be the same sheen as the base coat—or a higher sheen for more contrast.
- Prep the walls as mentioned for Color Washing.
- Paint the base coat. Allow to dry for a minimum of 24 hours.
- Prepare the glaze mixture with 4 parts of glaze to 1 part of paint. Mix thoroughly.
- Apply the glaze mixture to the wall in 4-foot sections, working from ceiling to floor, to create the strié effect. Before the glaze dries, drag your strié brush from ceiling to floor, stopping just below the taped baseboard. You can also use a wallpaper paste brush, a faux-finishing comb or similar tool to create the effect.
- Overlap the just completed section by about a quarter of an inch and continue around the room. It’s okay if the strié lines are not perfect. The small imperfections will give the lines a nubby, textured look, adding to the charm of the finish.

 Interior Paints
 Exterior Paints
 Primers
 Stains & Clears
 Paint Brushes
 Paint Roller
 Paint Trays & Liners